How to Configure MySQL 8 Multi Master Replication on Ubuntu
Note : Please follow the Master-Slave Configuration and make sure replication is working between Master to Slave. I tested and created the document on the same here
Now let us continue how to enable the replication from Slave to Master. We can call it as Multi Master replication or Bi-directional replication
1. On MySQL-Slave Node We have to create replication user in MySQL-Slave and allow access from MySQL-Master
ubuntu@MySQL-Slave:~$ mysql -u root -p mysql> create user rpl_user@192.168.0.8 identified by ‘password’; Query OK, 0 rows affected (0.08 sec) Grant the user REPLICATION SLAVE privileges:
mysql> grant replication slave on . to rpl_user@192.168.0.8; Query OK, 0 rows affected (0.09 sec) mysql> flush privileges; Query OK, 0 rows affected (0.00 sec) Confirm grants for created user:
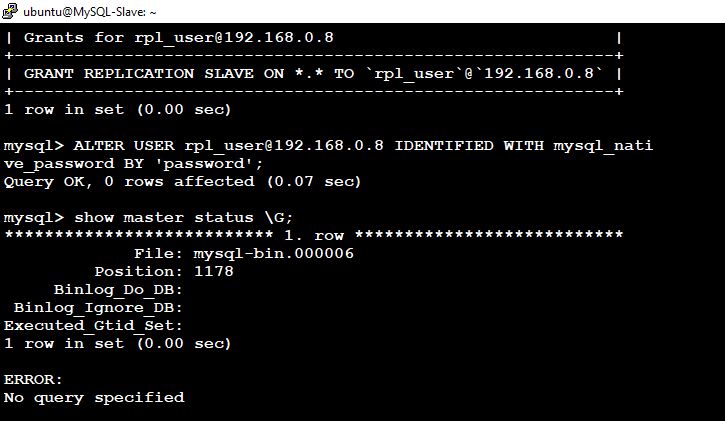
mysql> show grants for rpl_user@192.168.0.8;
ALTER USER rpl_user@192.168.0.8 IDENTIFIED WITH mysql_native_password BY ‘password’;
mysql> show master status \G;
Take a note of current Master log file and position
2. On MySQL-Master – Node We have to update the MASTER_HOST in MySQL-Master node as MySQL-Slave
mysql>CHANGE MASTER TO MASTER_HOST=’192.168.0.9′, MASTER_USER=’rpl_user’, MASTER_PASSWORD=’password’, MASTER_LOG_FILE=’mysql-bin.000006′, MASTER_LOG_POS=1178;
mysql> start slave;
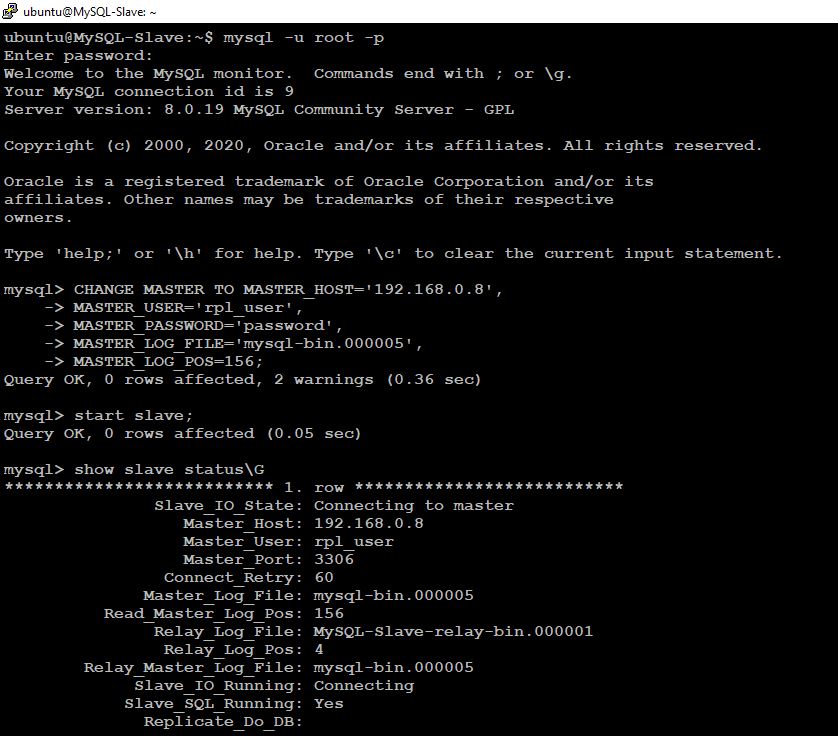
Check and confirm the Master and Slave Status on Both Node
Yes !!!! Now Any Change on Master node will be replicated to Slave Node and vice versa
How to Configure MySQL 8 Master Slave Replication on Ubuntu
Setup Prerequisites: You need to have MySQL Server installed on all servers Make sure the Hostname and IP addresses are added on /etc/hosts # Hosts Entry for MySQL Master & Slave Node 192.168.0.8 MySQL-Master MySQL-Master 192.168.0.9 MySQL-Slave MySQL-Slave
Step 1: Configure the Master Server:
server-id and log_bin location have to be configured
The first configuration change to make is setting Server ID for the master database:
$ sudo vi /etc/mysql/mysql.conf.d/mysqld.cnf
Add the line below under [mysqld] section. Note that the number set needs to be unique, it can not be re-used on any node in the cluster.
server-id = 1
Set log_bin location, this is where all replication information is located. All the changes made on the master are written to this file. All slaves will copy data from it.
A complete simple configuration looks like below: [mysqld] pid-file = /var/run/mysqld/mysqld.pid socket = /var/run/mysqld/mysqld.sock datadir = /var/lib/mysql log-error = /var/log/mysql/error.log server-id = 1 log-bin = /var/log/mysql/mysql-bin.log tmpdir = /tmp binlog_format = ROW max_binlog_size = 500M sync_binlog = 1 expire-logs-days = 7 slow_query_log Restart mysql service for changes to take effect:
$ sudo systemctl restart mysql
Step 2: Create Replication user on Master database server
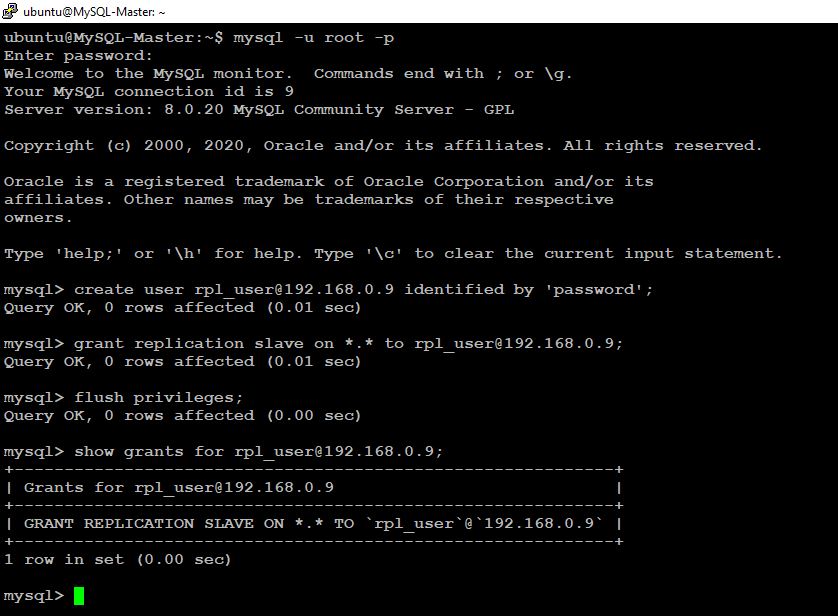
We now need to create a database user to be used by slaves when connecting. Login to MySQL database as root user and create the user: ubuntu@MySQL-Master:~$ mysql -u root -p mysql> create user rpl_user@192.168.0.9 identified by ‘password’; Query OK, 0 rows affected (0.08 sec) Grant the user REPLICATION SLAVE privileges:
mysql> grant replication slave on . to rpl_user@192.168.0.9; Query OK, 0 rows affected (0.09 sec) mysql> flush privileges; Query OK, 0 rows affected (0.00 sec) Confirm grants for created user:
mysql> show grants for rpl_user@192.168.0.9; +——————————————————————+ | Grants for rpl_user@192.168.0.9 | +——————————————————————+ | GRANT REPLICATION SLAVE ON . TO rpl_user@192.168.0.9;| +——————————————————————+ 1 row in set (0.00 sec)
Step 3: Configure Slave Server
Let us configure slave by editing the file: we have to configure below three configuration server-id read_only log_bin
This sets the slave to read-only mode. Only users with the SUPER privilege and the replication slave thread will be able to modify data on it. This ensures there are no applications that can accidentally modify data on the slave instead of master.
server-id = 2:
This is a Unique server identification number. It will default to 1 if “master-host” is not set.
log_bin = /var/log/mysql/mysql-bin.log:
This enables binary logging. This is required for acting as a MASTER in a replication configuration. You also need the binary log if you need the ability to do point in time recovery from your latest backup.
Restart mysql server after you’ve finished making changes:
$ sudo systemctl restart mysql
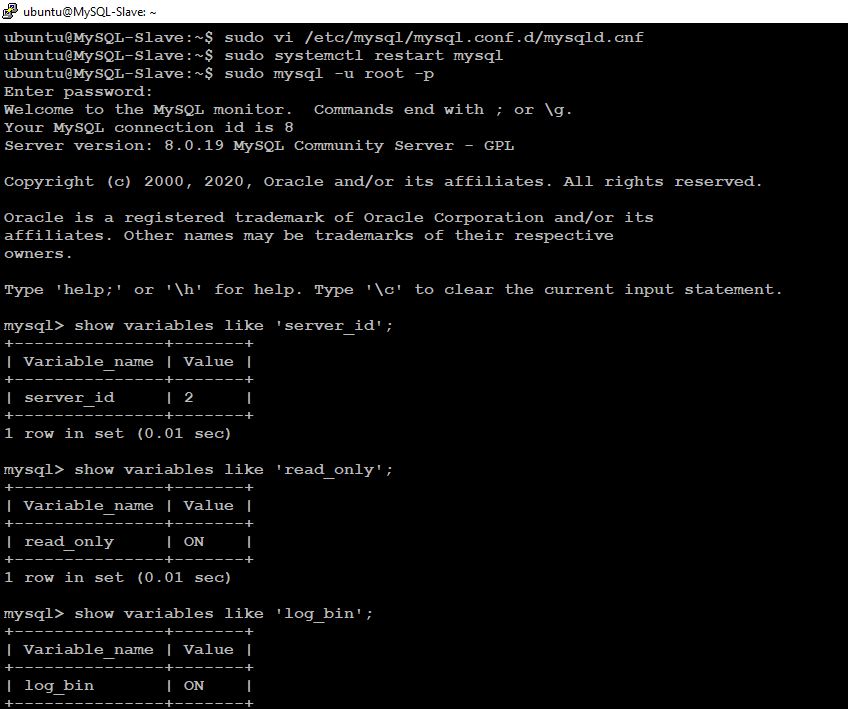
sudo vi /etc/mysql/mysql.conf.d/mysqld.cnf sudo systemctl restart mysql sudo mysql -u root -p show variables like ‘server_id’; show variables like ‘read_only’; show variables like ‘log_bin’;
Step 4: Initialize Replication process
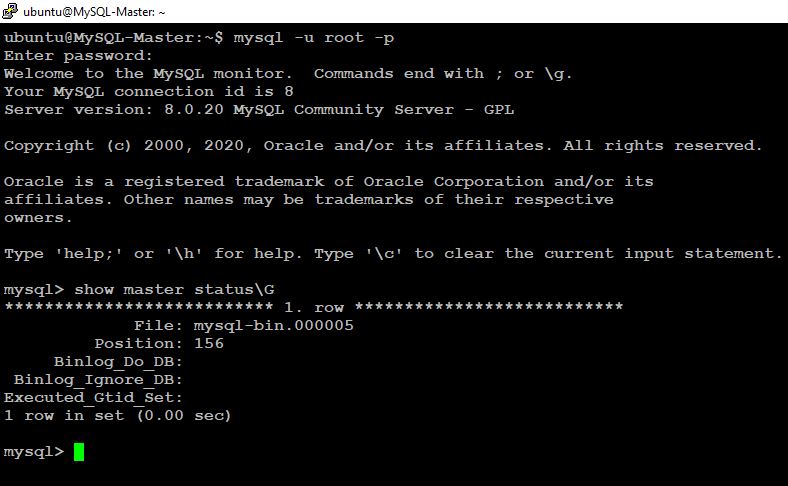
We should be ready to start Replication process on the slave server. Start by checking Status on the master:
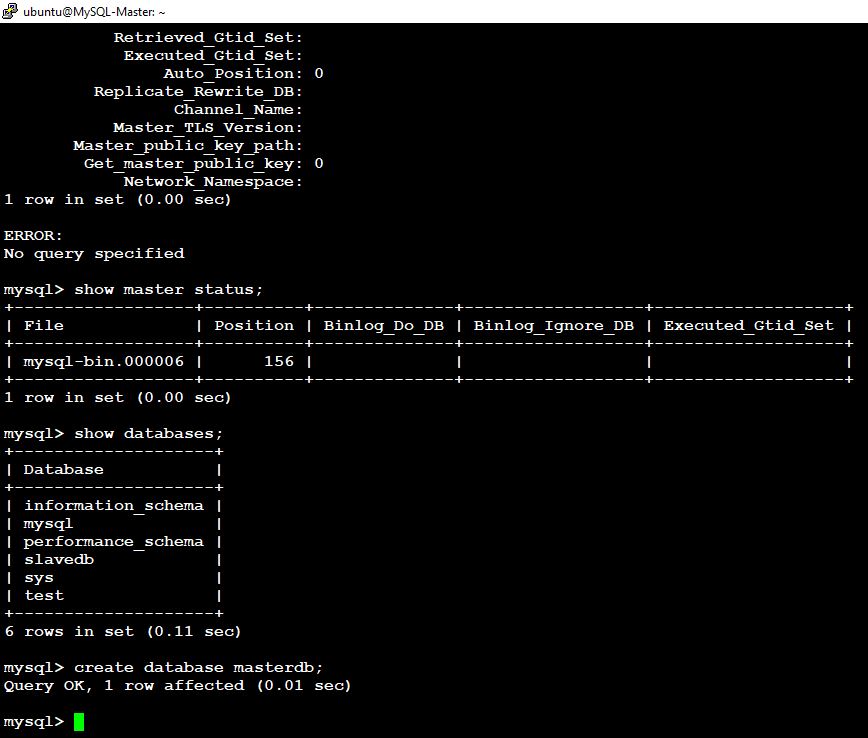
mysql> show master status\G * 1. row * File: mysql-bin.000005 Position: 156 Binlog_Do_DB: Binlog_Ignore_DB: Executed_Gtid_Set: 1 row in set (0.00 sec)
Take a note of current Master log file and position. Then configure Slave server with details obtained from the master status command:
ALTER USER rpl_user@192.168.0.9 IDENTIFIED WITH mysql_native_password BY ‘password’;
user rpl_user@192.168.0.9 identified by ‘password’;
Issue 2: Last_IO_Error: Fatal error: The slave I/O thread stops because master and slave have equal MySQL server UUIDs; these UUIDs must be different for replication to work.
Reason:
Server UUIDs is automatically generated but it was copied when we cloned mysql instance
It can be simply fixed by removing that auto generated auto.conf file and restart MySQL server. Enjoy your MySQL Master-Slave replication!!!
On the Slave Node Stop MySQL sudo systemctl stop mysql sudo rm -f /var/lib/mysql/auto.cnf sudo reboot (You can restart the computer or Just restart the MySQL instance)
Cloning a virtual machine means making a copy of it, so that you can create multiple virtual machines or templates from the original.
We already created a VM and Installed MySQL 8.0 on the VM (MySQL-Master). Instead of creating another VM and install MySQL we can simply clone the existing VM which will allow you to have copy of MySQL-Master which have MySQL also installed in it.
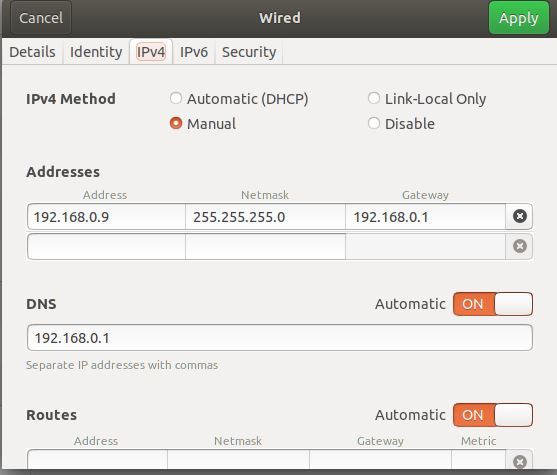
Only Configuration you have to change is IP address of the Cloned Machine as the clone will create VM with same IP Address.
Main VM Machine – MySQL-Master Cloned Vm Machine – MySQL-Slave
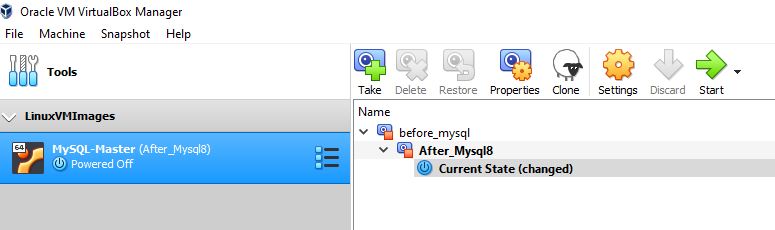
Step 1: Shutdown MySQL-Master VM Machine
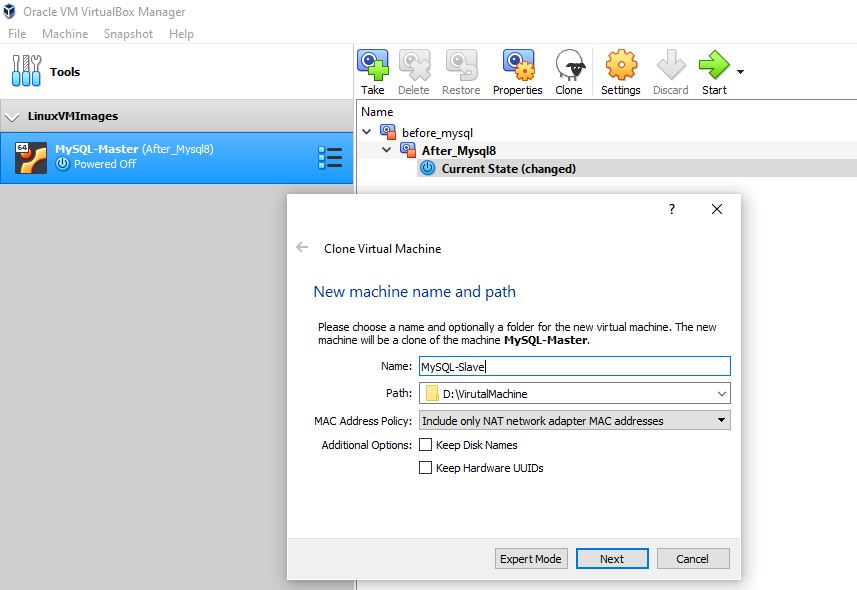
Step 2: Click “Clone” on MySQL-Master VM Machine
Step 3: Update the Name of Cloned Machine “MySQL-Slave”
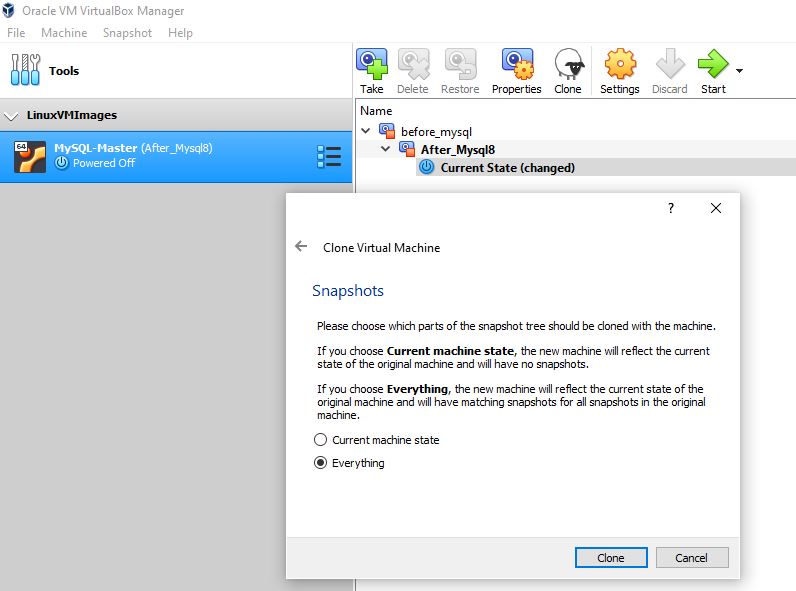
Step 4: Choose the Clone Machine State – Everything
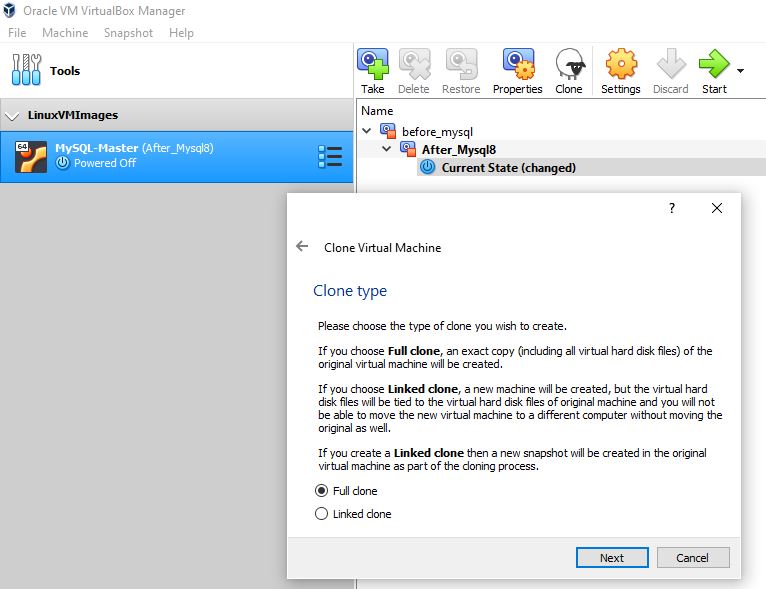
Step 5: Choose the Clone Type – Full
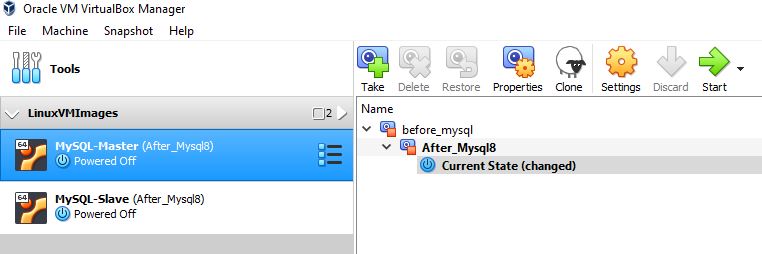
Step 6: Complete – Will clone the machine and create a New VM Machine
Step 7: Update the Network Address to avoid conflict.
Step 1: Install Oracle VM VirtualBox or Any available virtual environment
Step 2: Download Ubuntu 18 VM Image from any available website.
I downloaded from linuxvmimages https://www.linuxvmimages.com/images/ubuntu-1804/ Please make important note provided in the page where you are downloading the images SYSTEM & LOGIN DETAILS vCPU: 1 , RAM: 2GB , DISK: 100GB , /boot : 500MB , swap : 4GB , / : 85GB ,/home: 10GB Network: Bridged, Username: ubuntu , Password : ubuntu (to become root, use sudo su -)
Observation: While Downloading and importing virtual appliance faced below error and noticed it is because of below two reasons
Space issue
Download issue – Double confirm you downloaded properly. Note: You do not need 100GB. It will grow only when you start using it.
Step 3: Open Oracle VM Box and Import Alliance using the above downloaded file.
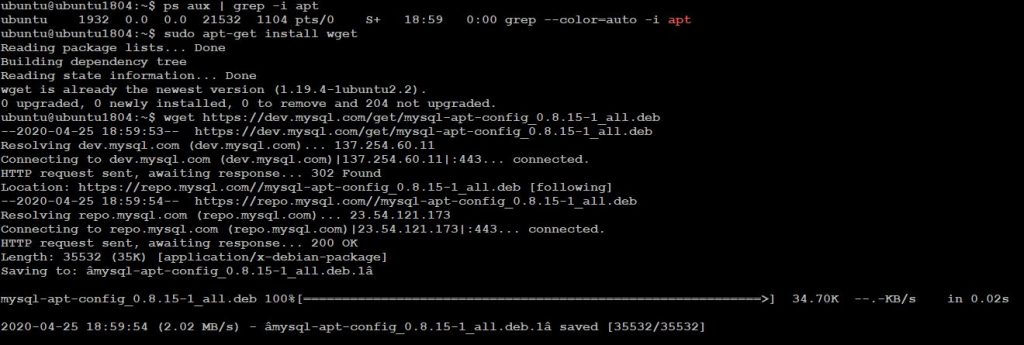
Step 4: Login to the VM Machine and confirm you are able to access internet and Download MySQL 8.0
Note: The above command will run successfully only when you do not see any lock on dpkg. As ubuntu releases lot patches and if your VM is connected with internet then there as possible some unattended updates may be in-progress. Please make sure you kill those process or wait until it get completed.
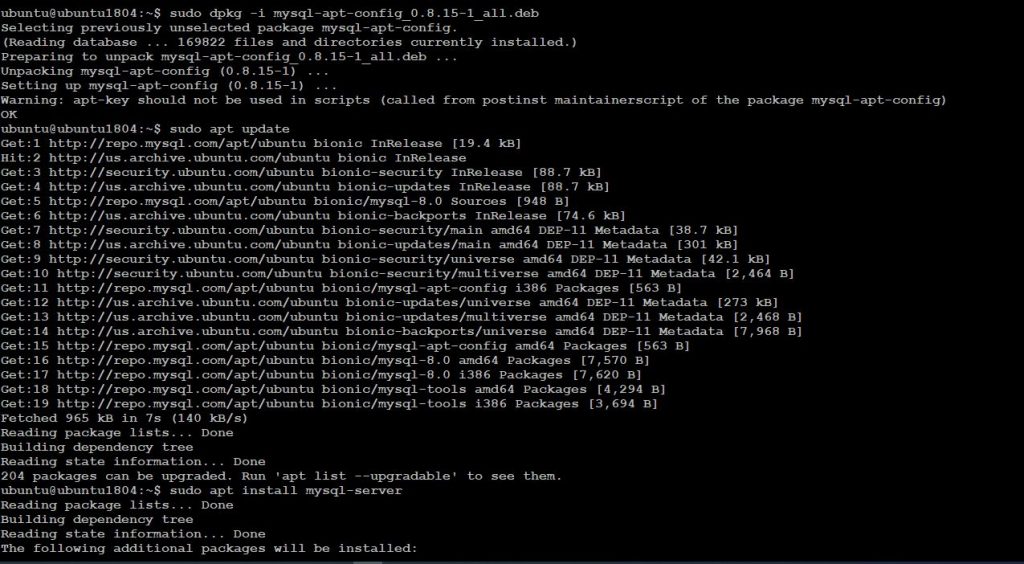
$ sudo dpkg -i mysql-apt-config_0.8.15-1_all.debNote: The above will allow you to Choose the version and press "OK"
This will bring back to Terminal Window
Once the repo has been added, update apt index and install mysql-server:
$ sudo apt update$ sudo apt install mysql-server
Accept Agreement
Set root password for MySQL database
Select default Authentication plugin
Confirm installed version of MySQL server:
ubuntu@ubuntu1804:~$ sudo apt policy mysql-server
mysql-server:
Installed: 8.0.19-1ubuntu18.04
Candidate: 8.0.19-1ubuntu18.04
Version table:
*** 8.0.19-1ubuntu18.04 500
500 http://repo.mysql.com/apt/ubuntu bionic/mysql-8.0 amd64 Packages
100 /var/lib/dpkg/status
Step 6: Enable the MySQL Server
ubuntu@ubuntu1804:~$ sudo systemctl enable --now mysql
Synchronizing state of mysql.service with SysV service script with /lib/systemd/systemd-sysv-install.
Executing: /lib/systemd/systemd-sysv-install enable mysql
ubuntu@ubuntu1804:~$
Check the Status of MySQL
ubuntu@ubuntu1804:~$ systemctl status mysql
mysql.service - MySQL Community Server
Loaded: loaded (/lib/systemd/system/mysql.service; enabled; vendor preset: enabled)
Active: active (running) since Fri 2020-04-24 18:32:46 EDT; 2min 34s ago
Docs: man:mysqld(8)
http://dev.mysql.com/doc/refman/en/using-systemd.html
Main PID: 7775 (mysqld)
Status: "Server is operational"
Tasks: 38 (limit: 2332)
CGroup: /system.slice/mysql.service
7775 /usr/sbin/mysqld
Apr 24 18:32:17 ubuntu1804 systemd[1]: Starting MySQL Community Server…
Apr 24 18:32:46 ubuntu1804 systemd[1]: Started MySQL Community Server.
ubuntu@ubuntu1804:~$
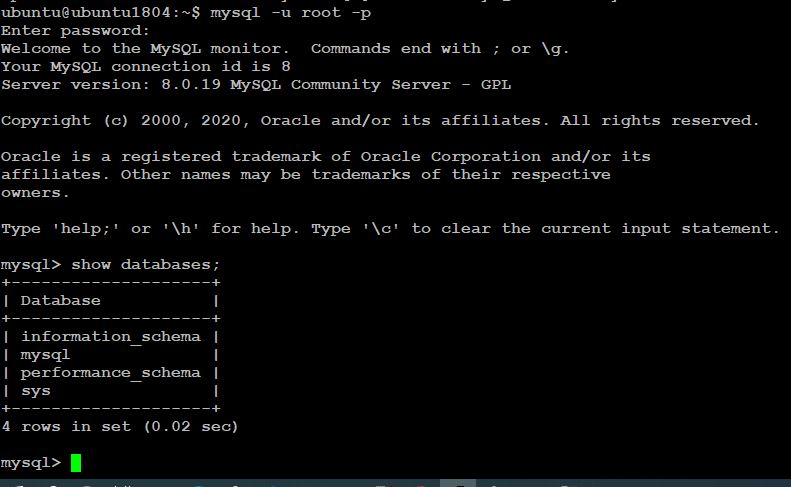
Login to the database and confirm the functionality
ubuntu@ubuntu1804:~$mysql -u root -p
ubuntu
Issues Faced and Fixes :
root@ubuntu1804:~# sudo dpkg -i mysql-apt-config_0.8.15-1_all.deb
dpkg: error: dpkg frontend is locked by another process
root@ubuntu1804:~#
Reason:
May be some other package is using the dpkg
Find who is using it
lsof /var/lib/dpkg/lock
ps aux | grep -i apt
Kill the process if you do not need it.
kill PID
wait
kill -9 PID
Make sure process is done:
Then remove the lock file:
sudo rm /var/lib/dpkg/lock
Let dpkg fix itself:
sudo dpkg --configure -a
Oracle allows access to external network services using several PL/SQL APIs (UTL_TCP, UTL_SMTP, UTL_MAIL, UTL_HTTP and UTL_INADDR), all of which are implemented using the TCP protocol. In previous versions of the database, access to external services was effectively an on/off switch based on whether a user was granted execute permissions on a specific package or not. Oracle 11g introduced fine grained access to network services using access control lists (ACL) in the XML DB repository, allowing control over which users access which network resources, regardless of package grants. Oracle provide the DBMS_NETWORK_ACL_ADMIN and DBMS_NETWORK_ACL_UTILITY packages to allow ACL management from PL/SQL.
Oracle Database 12c has deprecated many of the procedures and functions in the DBMS_NETWORK_ACL_ADMIN package, replacing them with new procedures and functions. We still have the concept of Access Control Lists (ACLs), but these are often created implicitly when adding an Access Control Entry (ACE), which is similar to adding privileges using the previous API. The biggest change is an Access Control Entry can be limited to specific PL/SQL APIs (UTL_TCP, UTL_INADDR, UTL_HTTP, UTL_SMTP, and UTL_MAIL).
How to see Network Access Level on your database is granted.
set linesize 200 set pagesize 200 col host format a30 col ACL format a50 col acl_owner format a10 select * from dba_network_acls;
set linesize 200 set pagesize 200 col host format a30 col start_date format All col end_date format All col principal format a25 col privilege format a10
select host,lower_port,upper_port,ace_order, to_char(start_date,’DD-MON-YYYY’) AS start_date, to_char(end_date,’DD-MON-YYYY’) AS end_date, grant_type,inverted_principal,principal,principal_type, privilege from dba_host_aces order by bosts,ace_order;
How to ORA-20000: Failed to send email: Error Code-24247: ORA-24247 : network access denied by access control list(ACL)
The above is failed for Network Access Level for Sending Email. For email is port 25. You can grant access on to the particular host/domain to grant for port 25 as below
Note: From a security standpoint, it’s not a good idea to allow complete network access from the database,
privilege_list : The list of privileges available to the ACE. principal_name : The database user the ACE applies to. principal_type : You will always use XS_ACL.PTYPE_DB for these network ACEs as they apply to users and roles.
The privilege_list specifies one or more privileges in a comma separated list. The available privileges are shown below.
http : Access restricted to the UTL_HTTP package and the HttpUriType type. http_proxy : Needed in conjunction with http if HTTP access is via a proxy. smtp : Access restricted to the UTL_SMTP and UTL_MAIL packages. resolve : Access restricted to the UTL_INADDR packages. connect : Opens access to the UTL_TCP, UTL_SMTP, UTL_MAIL, UTL_HTTP, and DBMS_LDAP packages and the HttpUriType type. jdwp : Enables Java Debug Wire Protocol debugging operations.
innodb_flush_log_at_trx_commit to 2 will help on increasing speed of replication in case of latency between Master and Slave. It is not a recommended solution and you should not consider as permanent solution.
The default setting of 1 is required for full ACID compliance. Logs are written and flushed to disk at each transaction commit.
With a setting of 0, logs are written and flushed to disk once per second. Transactions or which logs have not been flushed can be lost in a crash.
With a setting of 2, logs are written after each transaction commit and flushed to disk once per second. Transactions for which logs have not been flushed can be lost in a crash.
Suggession and Recommendation
innodb_flush_log_at_trx_commit = 0 if: it is my development computer or home mini database where is no sensitive data.
innodb_flush_log_at_trx_commit = 2 if: it is blog/stats/e-commerce (with ~100x shop in day), etc.
innodb_flush_log_at_trx_commit = 1 if: you have a lot of customers or you need to work with money transaction like bank. so this time you should split your dataflow between several servers to have speed & safety.
You can use 2, because it has ~75x faster write speed and it fails ONLY if hardware fails.
MySQL Replication Events:
Statement based – in which case these are write queries
Row based – in this case these are changes to records, sort of row diffs if you will
Master :
Master needs to be writing replication events to a special log called binary log. This is usually very lightweight activity (assuming events are not synchronized to disk), because writes are buffered and because they are sequential. The binary log file stores data that replication slave will be reading later.
Whenever a replication slave connects to a master, master creates a new thread for the connection (similar to one that’s used for just about any other server client).
This connection will do the following
(a) feeding replication slave with events from the binary log.
(b) notifying slave about newly written events to its binary log.
Slaves that are up to date will mostly be reading events that are still cached in OS cache on the master.
However, when you connect a replication slave that is few hours or even days behind, it will initially start reading binary logs that were written hours or days ago – master may no longer have these cached, so disk reads will occur.
Slave :
When you start replication, two threads are started on the slave
1. IO thread
This process called IO thread connects to a master, reads binary log events from the master as they come in and just copies them over to a local log file called relay log.
Master_Log_File – last file copied from the master (most of the time it would be the same as last binary log written by a master)
Read_Master_Log_Pos – binary log from master is copied over to the relay log on the slave up until this position.
you can compare it to the output of “show master status” from the master.
2. SQL thread
The second process – SQL thread – reads events from a relay log stored locally on the replication slave (the file that was written by IO thread) and then applies them as fast as possible.
Relay_Master_Log_File – binary log from master, that SQL thread is “working on”
Exec_Master_Log_Pos – which position from master binary log is being executed by SQL thread.
Key word to remember is Bin Log and Relay Log
You are in the process of investigating an issue and seems that process is not running as expected compared with other environment or compared to previous execution.
There could be chance that your process might have started with wrong environment variables then the regular execution. To identify it you can check the process and its related environment variables when it was started
How to achieve it ?
Method 1 : Add the “e” modifier to “ps” to also show all environment variables
$ ps e -ww -p 96034
PID TTY STAT TIME COMMAND
96034 ? Sl 0:00 /path/to/your/script.sh TERM=linux PATH=/sbin:/usr/sbin:/bin:/usr/bin runlevel=3 RUNLEVEL=3 SUPERVISOR_GROUP_NAME=xxx PWD=/var/www/vhosts/worker.nucleus.be/cron-tasks LANGSH_SOURCED=1 LANG=en_US.UTF-8 previous=N
Method 2: Get the PID and access the environment file under /proc First, check your PID: $ ps faux | grep ‘your_process’ 508 96034 0.0 0.3 44704 3584 ? Sl 10:10 0:00 _ /path/to/your/script.sh
check the environment variables in /proc/$PID/environ
to get that output more readable, you can do two things. Either parse the null character (\0) and replace them by new lines (\n) or use the strings tool that does this for you